> ## Documentation Index
> Fetch the complete documentation index at: https://docs.surveystream.idinsight.io/llms.txt
> Use this file to discover all available pages before exploring further.
# Assignments Configuration
## Overview
This page provides details on how to configure the [Assignments](/assignments) feature on SurveyStream.
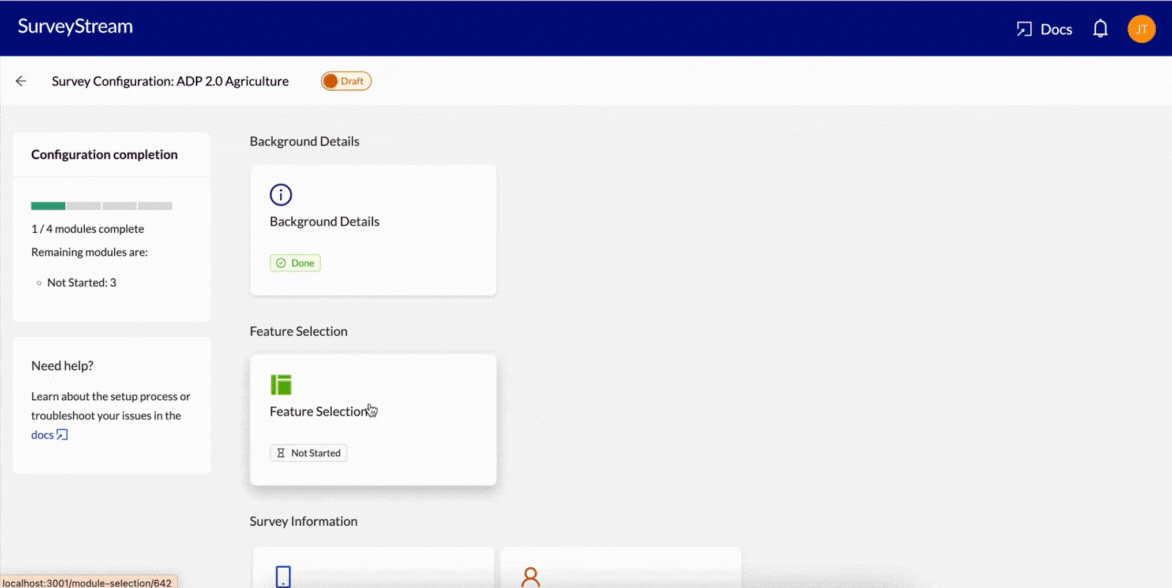
To enable the assignments module, select `Assignments` under `Feature Selection`.
 ## Prerequisites
This step has the following prerequisites:
1. Configure your main form on SurveyStream.
Complete the [SurveyCTO Integration](/surveycto_integration) step on SurveyStream. This is the form for which you want to create assignments.
2. (Optional) Configure [Locations](/locations_configuration).
This is required if you selected location as a mapping criteria in the [Module Questionnaire](/basic_information#module-questionnaire) or if you'd like to see location details (like the target's geographical location) on the assignments screen.
3. Configure [Targets](/targets).
4. Configure [Enumerators](/enumerators_configuration).
5. Configure at least one field supervisor role and corresponding users in the [User and Role Management](/user_and_role_management) module.
This is mandatory because field supervisors can only view and manage assignments for targets that are mapped to them.
6. Ensure all targets and surveyors are mapped in [Supervisor Mapping](/supervisor_mapping).
This controls which targets and surveyors are visible to each field supervisor. Targets or surveyors which are not mapped to any supervisor will not be visible to any supervisor for assignments.
7. [Survey Status for Targets](/target_status_mapping).
This is used to calculate the status of each target - whether it is `completed`, `refused` etc. and whether it is eligible for assignment.
8. (Optional) Configure the [Email Automation](/features_at_a_glance#emails) feature.
This is required if you want to send emails to surveyors with details of their assigned targets.
## Configuration
### Datasets to prepare
#### **Assignments (Optional)**
If you don't want to make all your initial assignments from scratch using the UI, you can pre-populate the assignments tables by uploading a csv file. The data must meet the following requirements:
1. The file has one row per target
2. The file must have the following two fields with the exact column headers:
* `target_id`: The ID of the target to be assigned.
* `enumerator_id`: The ID of the surveyor to whom the target is assigned.
3. There should be no null or empty values in the file.
**Click to view a sample assignments csv file.**
### Upload the initial assignments data
Once a csv file is prepared as per the requirements provided [above](#assignments), go to the `Assignments` tab and click on the `Upload assignments` button. Select the csv file to upload. If there are no errors, the assignments will be loaded on SurveyStream.
You can reupload assignments data at any time during the survey. When
uploaded, the data from the file overwrites existing assignments on
SurveyStream.
#### Walkthrough
{" "}
### Configure the columns to be shown on the assignment tables
You can customize the assignment screen tables by adding and removing columns depending on what fields are required for performing assignments. Columns can also be grouped or reordered and both column and group names can be edited based on your needs. To customize the assignments tables, click on the `Edit column configuration` icon on the top right of the assignments screen.
Configuration options are available for five tables that correspond to the following parts of the assignments feature:
* **Assignments Main**: the table shown on the `Assignments` tab of the main assignments landing page.
* **Surveyors**: the table shown on the `Surveyors` tab of the main assignments landing page.
* **Targets**: the table shown on the `Targets` tab of the main assignments landing page.
* **Assignments Surveyors**: the table of available surveyors that is shown when clicking on the `Make assignments` button.
* **Assignments Review**: the table of proposed assignments that is shown in the `Review assignments` stage of the assignment process.
In each of these tables, you can add or remove columns from a master list of available columns which are:
1. All columns uploaded in the targets dataset, including custom fields.
2. All columns uploaded in the enumerators dataset, including custom fields.
3. Location ID and name columns (These columns show the location of the target on **Assignments Main**, **Targets** and **Assignments Review** tables and that of the surveyor on the **Surveyors** and **Assignments Surveyors** tables).
4. Supervisor name and email columns (The specific supervisor columns shown to a user depends on their level in the role hierarchy. Only child supervisors of a logged-in supervisor are shown).
5. Columns showing the status of the target based on SurveyCTO submissions. These include:
* Final survey status: This is the final status of the target as per SurveyCTO submissions.
{" "}
In general, final survey status is the response to the question mapped to
`Survey status` (in [SurveyCTO question mapping](/surveycto_integration))
in the latest submission for each target. In case the target has a
submission with a status that has *"Refusal Flag"/"Completed Flag"* set
as True, that submission's status takes precedence and is shown as the
final status.
* Final survey status label: Because the final survey status is a numeric code, this field contains the corresponding label for the final status of the target. If the target has no submission yet in the SurveyCTO form, the value is "Not Attempted".
* Total attempts: The number of attempts to survey the given target. This is the count of all submissions for the target in the main form.
* Revisit sections: The response to the question mapped to `Revisit sections` in the last submission of the target in the main form.
* Refused: Whether the target has any submission with a status that has "Refusal Flag" set as True in the [Survey Status for Targets](/target_status_mapping) module.
* Completed: Whether the target has any submission with a status that has "Completed Flag" set as True in the [Survey Status for Targets](/target_status_mapping) module.
6. SurveyCTO fields: In addition to the above, you can add any variable from the SurveyCTO form to the assignments table. This column will have the response from the latest submission for the target. For example, you can add appointment date and time from SurveyCTO submissions to the assignments table and supervisors can use this information to plan their assignments.
#### Walkthrough
{" "}
Once these steps are complete, the assignments module is ready to be used. You can now create, review and manage assignments as well as update the status of surveyors during the survey as shown in the demo [here](/assignments#walkthrough).
## Prerequisites
This step has the following prerequisites:
1. Configure your main form on SurveyStream.
Complete the [SurveyCTO Integration](/surveycto_integration) step on SurveyStream. This is the form for which you want to create assignments.
2. (Optional) Configure [Locations](/locations_configuration).
This is required if you selected location as a mapping criteria in the [Module Questionnaire](/basic_information#module-questionnaire) or if you'd like to see location details (like the target's geographical location) on the assignments screen.
3. Configure [Targets](/targets).
4. Configure [Enumerators](/enumerators_configuration).
5. Configure at least one field supervisor role and corresponding users in the [User and Role Management](/user_and_role_management) module.
This is mandatory because field supervisors can only view and manage assignments for targets that are mapped to them.
6. Ensure all targets and surveyors are mapped in [Supervisor Mapping](/supervisor_mapping).
This controls which targets and surveyors are visible to each field supervisor. Targets or surveyors which are not mapped to any supervisor will not be visible to any supervisor for assignments.
7. [Survey Status for Targets](/target_status_mapping).
This is used to calculate the status of each target - whether it is `completed`, `refused` etc. and whether it is eligible for assignment.
8. (Optional) Configure the [Email Automation](/features_at_a_glance#emails) feature.
This is required if you want to send emails to surveyors with details of their assigned targets.
## Configuration
### Datasets to prepare
#### **Assignments (Optional)**
If you don't want to make all your initial assignments from scratch using the UI, you can pre-populate the assignments tables by uploading a csv file. The data must meet the following requirements:
1. The file has one row per target
2. The file must have the following two fields with the exact column headers:
* `target_id`: The ID of the target to be assigned.
* `enumerator_id`: The ID of the surveyor to whom the target is assigned.
3. There should be no null or empty values in the file.
**Click to view a sample assignments csv file.**
### Upload the initial assignments data
Once a csv file is prepared as per the requirements provided [above](#assignments), go to the `Assignments` tab and click on the `Upload assignments` button. Select the csv file to upload. If there are no errors, the assignments will be loaded on SurveyStream.
You can reupload assignments data at any time during the survey. When
uploaded, the data from the file overwrites existing assignments on
SurveyStream.
#### Walkthrough
{" "}
### Configure the columns to be shown on the assignment tables
You can customize the assignment screen tables by adding and removing columns depending on what fields are required for performing assignments. Columns can also be grouped or reordered and both column and group names can be edited based on your needs. To customize the assignments tables, click on the `Edit column configuration` icon on the top right of the assignments screen.
Configuration options are available for five tables that correspond to the following parts of the assignments feature:
* **Assignments Main**: the table shown on the `Assignments` tab of the main assignments landing page.
* **Surveyors**: the table shown on the `Surveyors` tab of the main assignments landing page.
* **Targets**: the table shown on the `Targets` tab of the main assignments landing page.
* **Assignments Surveyors**: the table of available surveyors that is shown when clicking on the `Make assignments` button.
* **Assignments Review**: the table of proposed assignments that is shown in the `Review assignments` stage of the assignment process.
In each of these tables, you can add or remove columns from a master list of available columns which are:
1. All columns uploaded in the targets dataset, including custom fields.
2. All columns uploaded in the enumerators dataset, including custom fields.
3. Location ID and name columns (These columns show the location of the target on **Assignments Main**, **Targets** and **Assignments Review** tables and that of the surveyor on the **Surveyors** and **Assignments Surveyors** tables).
4. Supervisor name and email columns (The specific supervisor columns shown to a user depends on their level in the role hierarchy. Only child supervisors of a logged-in supervisor are shown).
5. Columns showing the status of the target based on SurveyCTO submissions. These include:
* Final survey status: This is the final status of the target as per SurveyCTO submissions.
{" "}
In general, final survey status is the response to the question mapped to
`Survey status` (in [SurveyCTO question mapping](/surveycto_integration))
in the latest submission for each target. In case the target has a
submission with a status that has *"Refusal Flag"/"Completed Flag"* set
as True, that submission's status takes precedence and is shown as the
final status.
* Final survey status label: Because the final survey status is a numeric code, this field contains the corresponding label for the final status of the target. If the target has no submission yet in the SurveyCTO form, the value is "Not Attempted".
* Total attempts: The number of attempts to survey the given target. This is the count of all submissions for the target in the main form.
* Revisit sections: The response to the question mapped to `Revisit sections` in the last submission of the target in the main form.
* Refused: Whether the target has any submission with a status that has "Refusal Flag" set as True in the [Survey Status for Targets](/target_status_mapping) module.
* Completed: Whether the target has any submission with a status that has "Completed Flag" set as True in the [Survey Status for Targets](/target_status_mapping) module.
6. SurveyCTO fields: In addition to the above, you can add any variable from the SurveyCTO form to the assignments table. This column will have the response from the latest submission for the target. For example, you can add appointment date and time from SurveyCTO submissions to the assignments table and supervisors can use this information to plan their assignments.
#### Walkthrough
{" "}
Once these steps are complete, the assignments module is ready to be used. You can now create, review and manage assignments as well as update the status of surveyors during the survey as shown in the demo [here](/assignments#walkthrough).