Overview
The Emails module is used to configure and manage the Emails feature on SurveyStream. To enable the emails module, selectEmails under Feature Selection.
Prerequisites
Before configuring Emails, ensure the following are completed:- Configure the main form on SurveyStream Complete the SurveyCTO Integration step on SurveyStream. Each email configuration is linked to a specific main form and can contain data from the form if required.
- Configure surveyors Upload the list of surveyors in the Enumerators module in SurveyStream. Verify that the enumerator email addresses are correct.
- (Optional) Map surveyors to supervisors The immediate supervisor of a surveyor is CC’d on emails sent to the surveyor. For this to work, confirm that each surveyor is mapped to a supervisor in the Supervisor Mapping module. Also, verify that the supervisor email addresses are correct. If the surveyor is not mapped to a supervisor, the email will still be sent to the surveyor but not CC’d to any supervisor.
- (Optional) Finish configuring assignments on SurveyStream. If you’d like to send emails with assignment information, ensure that the assignments feature is configured. Check out assignments configuration for more details.
-
(Optional) Ensure data needed for emails is ready
The emails can have data from a Google Sheet or from a SurveyStream table:
-
If the source of data for the email is a Google Sheet, prepare the Google Sheet with the required data and grant dod-sheets@data-on-demand-225320.iam.gserviceaccount.com read access to the sheet.
The Google Sheet must have a column named
enumerator_idmatching the enumerator IDs in the enumerators dataset. This column is used to filter the data for each surveyor. -
If the source of data for the email is a SurveyStream table, kindly reach out to the SurveyStream team to set up the tables.
A table containing assignment data with all fields available for the Assignments module is provided in emails by default. The assignments table can also be configured to include fields from the latest SurveyCTO submission for a target using the
Edit column configurationfeature in Assignments.
-
If the source of data for the email is a Google Sheet, prepare the Google Sheet with the required data and grant dod-sheets@data-on-demand-225320.iam.gserviceaccount.com read access to the sheet.
Configuration
Key concepts
Email configuration
An email configuration is a set of settings that define a specific type of email to be sent to surveyors. You can create multiple email configurations for the same form, and each configuration has its own templates - one per language. For example, you can create an email configuration for sending assignments to surveyors and another configuration for sending data quality reports.Email schedule
An email schedule defines when and how often emails should be sent to surveyors. Each email configuration can have multiple schedules, each with its own set of dates and times. For example, you might create a schedule to send daily emails at 9 AM and another schedule to send weekly emails on Sundays at 7 PM.Email delivery report
After each scheduled email is sent, a delivery report is generated. This report shows the status of emails sent to surveyors.-
You can view the report in the Emails module by clicking on the
View Delivery Reportbutton next to the schedule name on the Emails home page: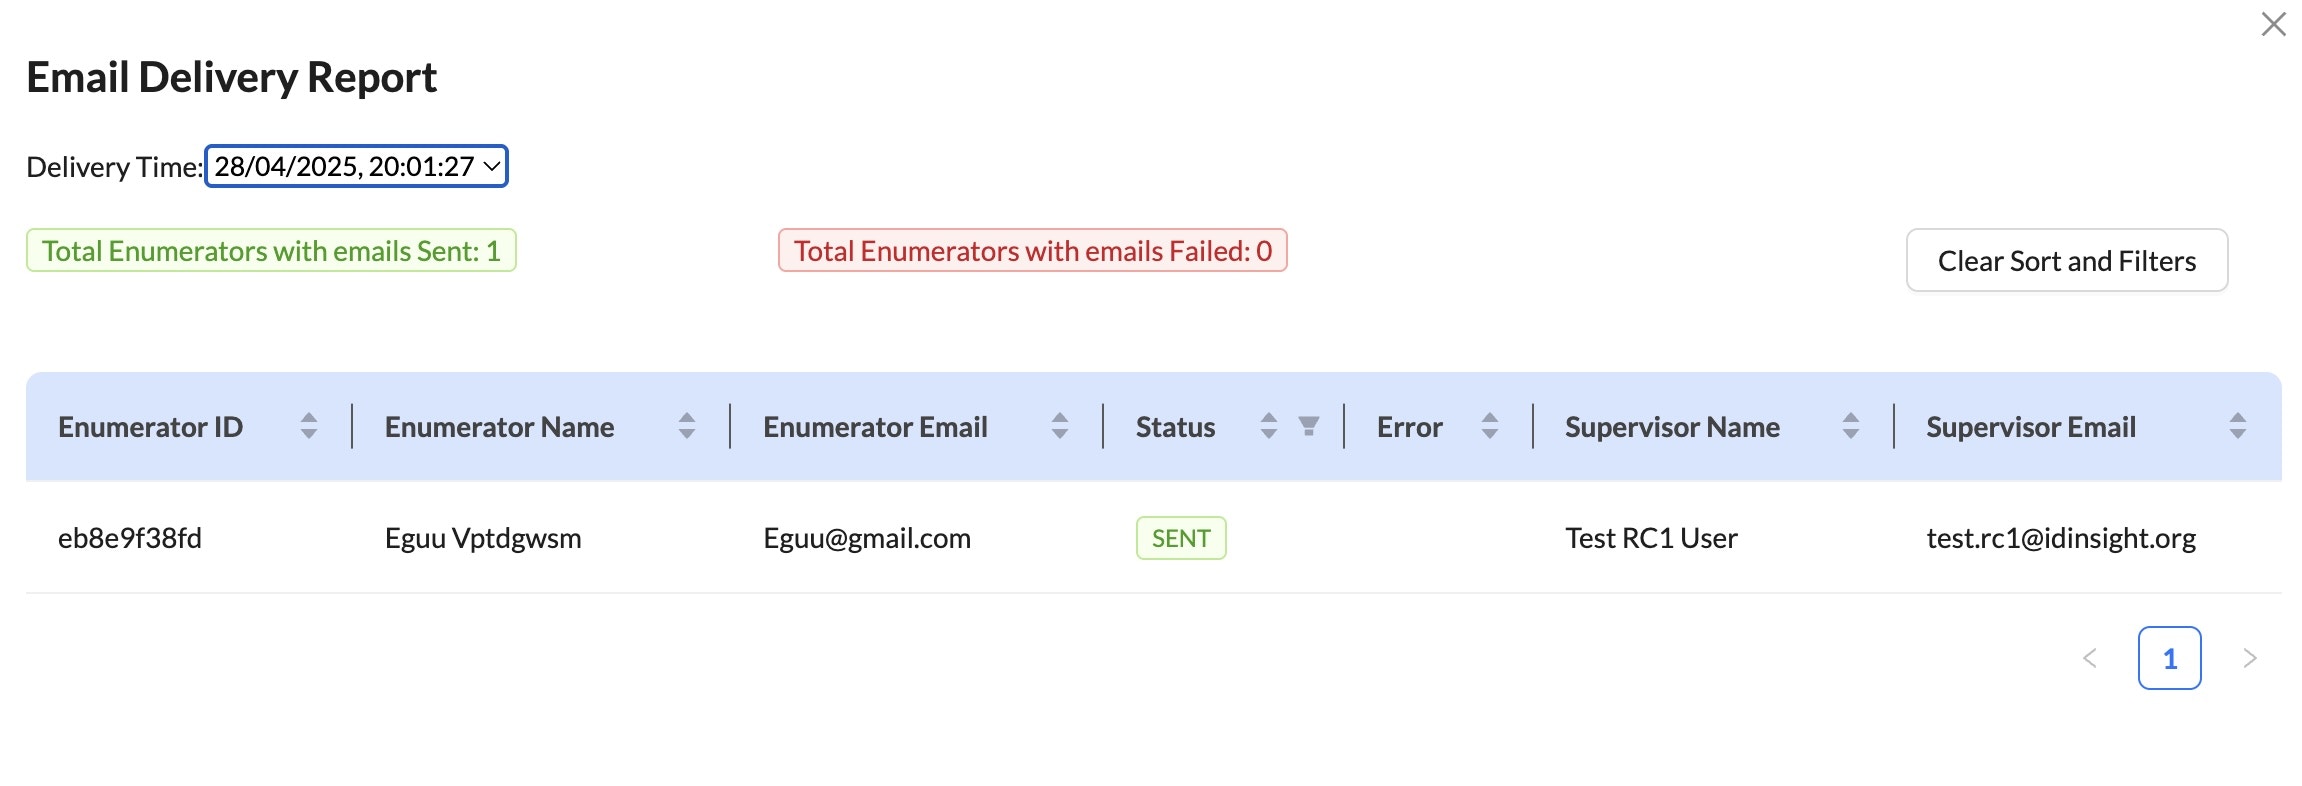
-
The report is also sent to the users selected in the
Team member(s) to receive email delivery reportfield during the email configuration step: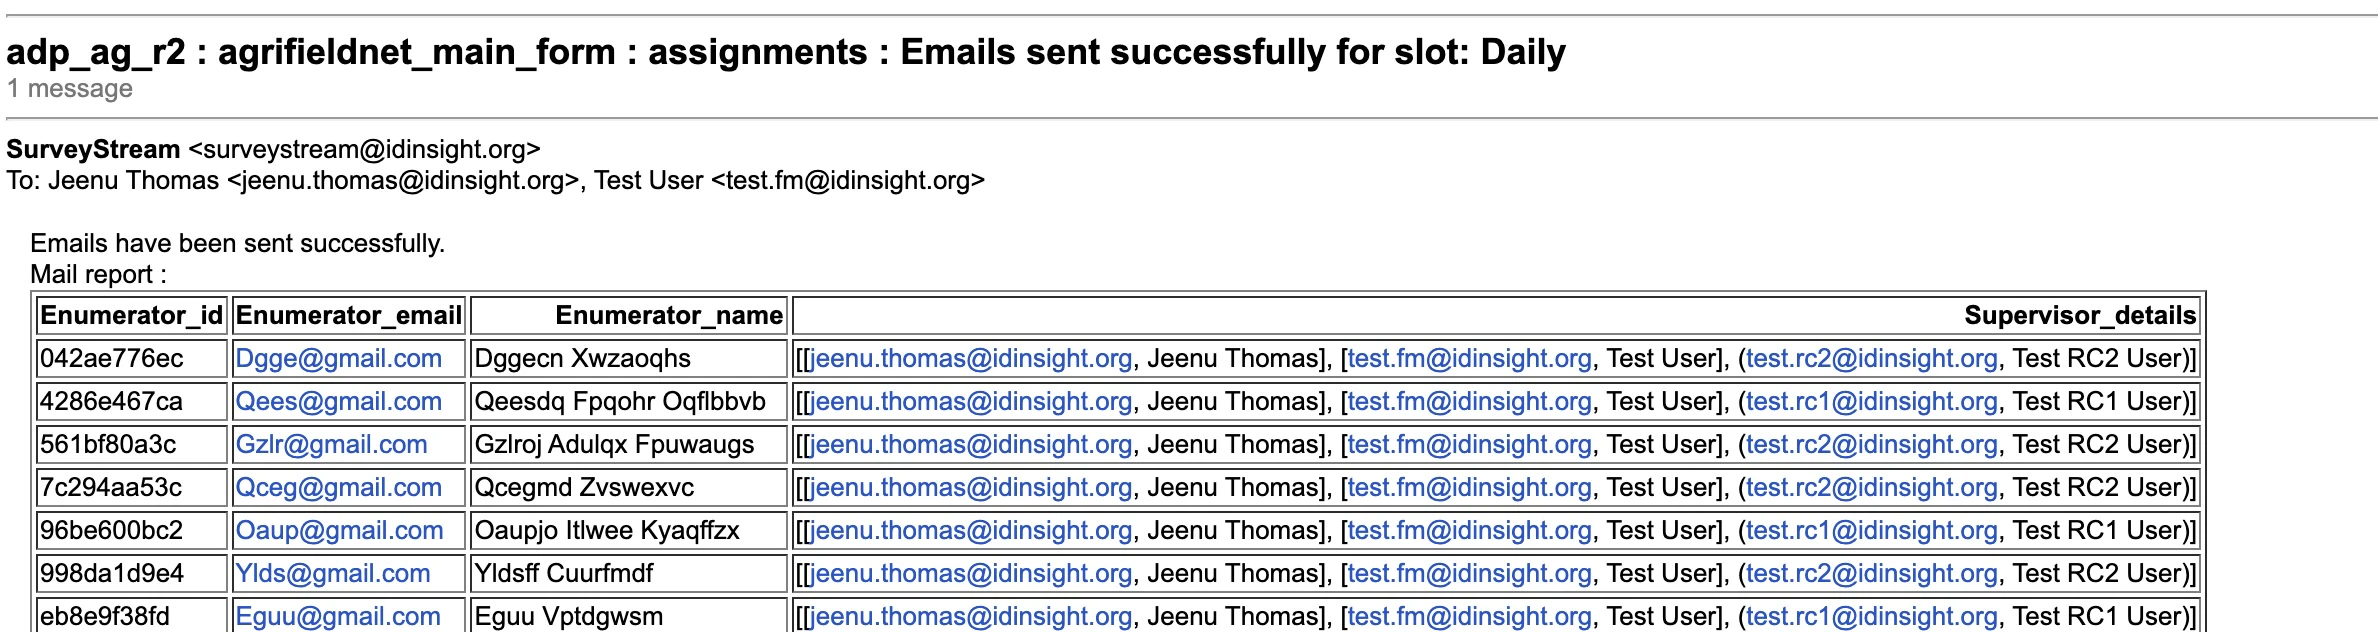
Add an email configuration
Click onConfigure Emails button to add a new email configuration.
Step 1. Email Config
-
Provide the following details:
 If you select an existing configuration name in this step, the system will load its existing details for editing.
 -
If the source of data for the email is a
Google Sheet, provide the following additional inputs: Click on
Load Google Sheet headersto test the connection and load column names from the sheet. These column names will be required in the next step when configuring the content of the email.When email data is from a Google Sheet, the project team is responsible for ensuring that the data on the sheet is up to date. SurveyStream will simply read the data from the sheet as is and send it in the email. -
If
Send PDF attachmentoption is selected, provide the following additional inputs: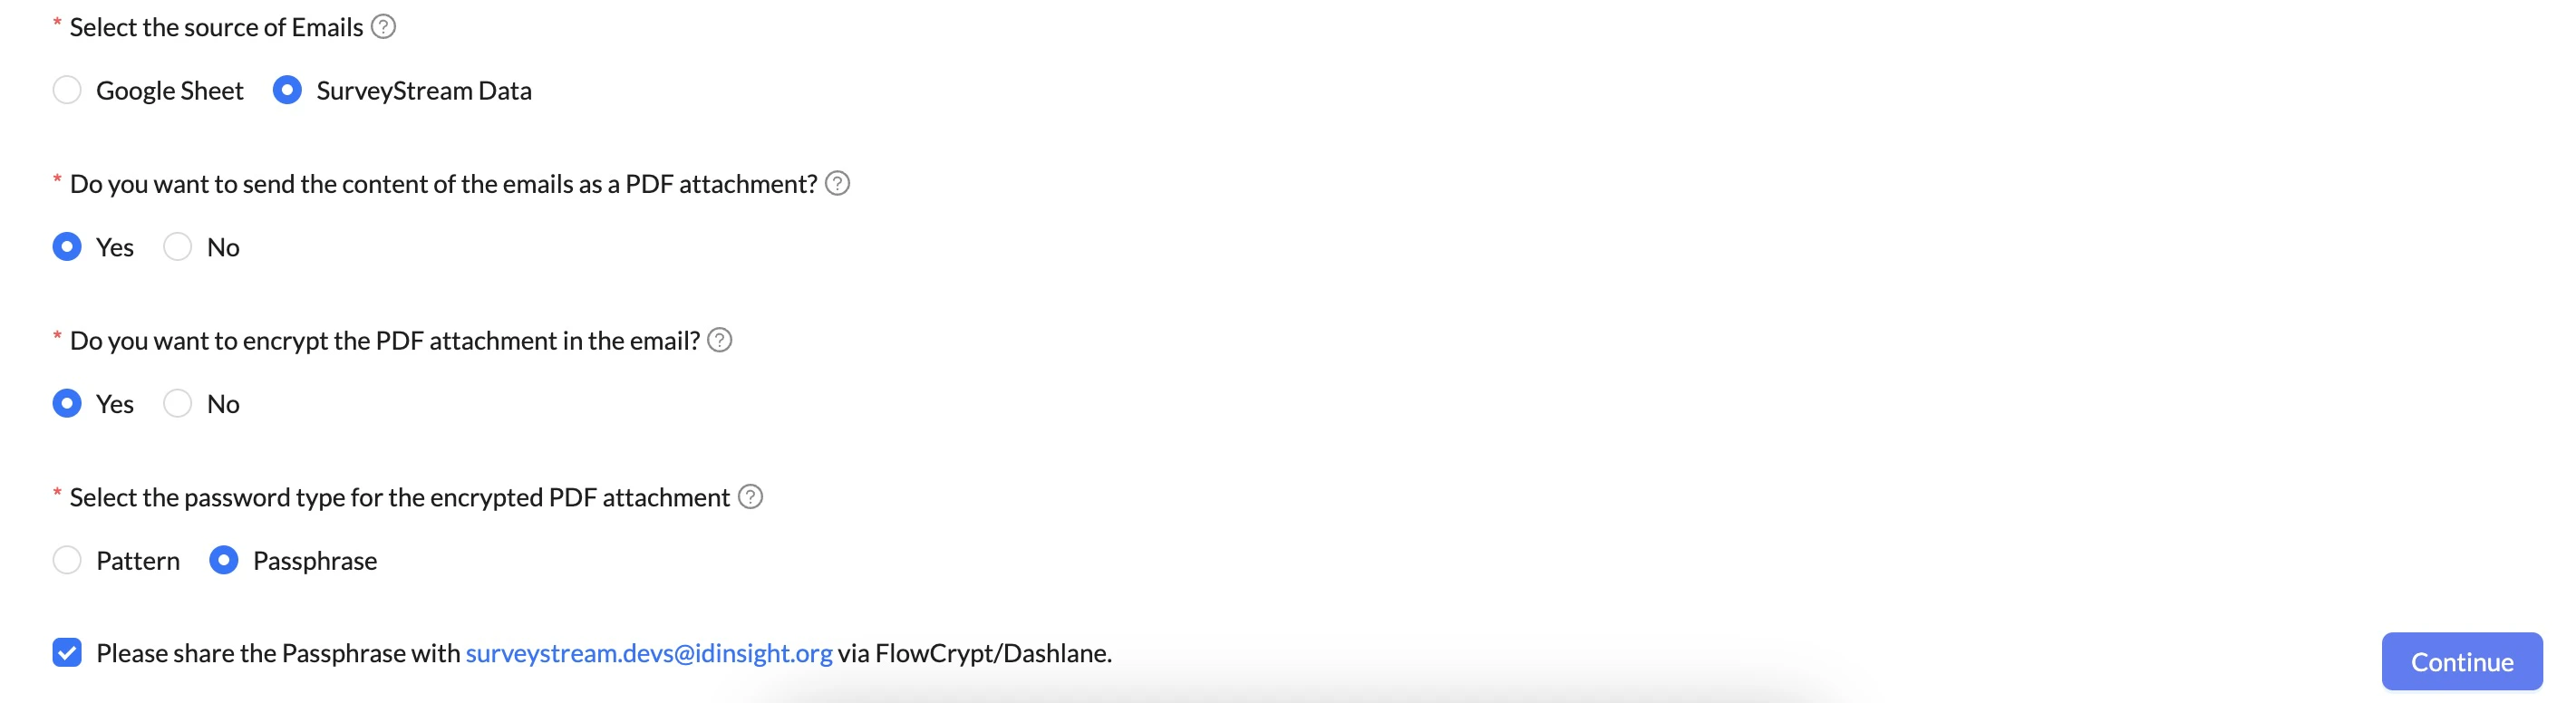
Continue to proceed to the next step.
Step 2. Email Templates
In this step, configure the content of the email: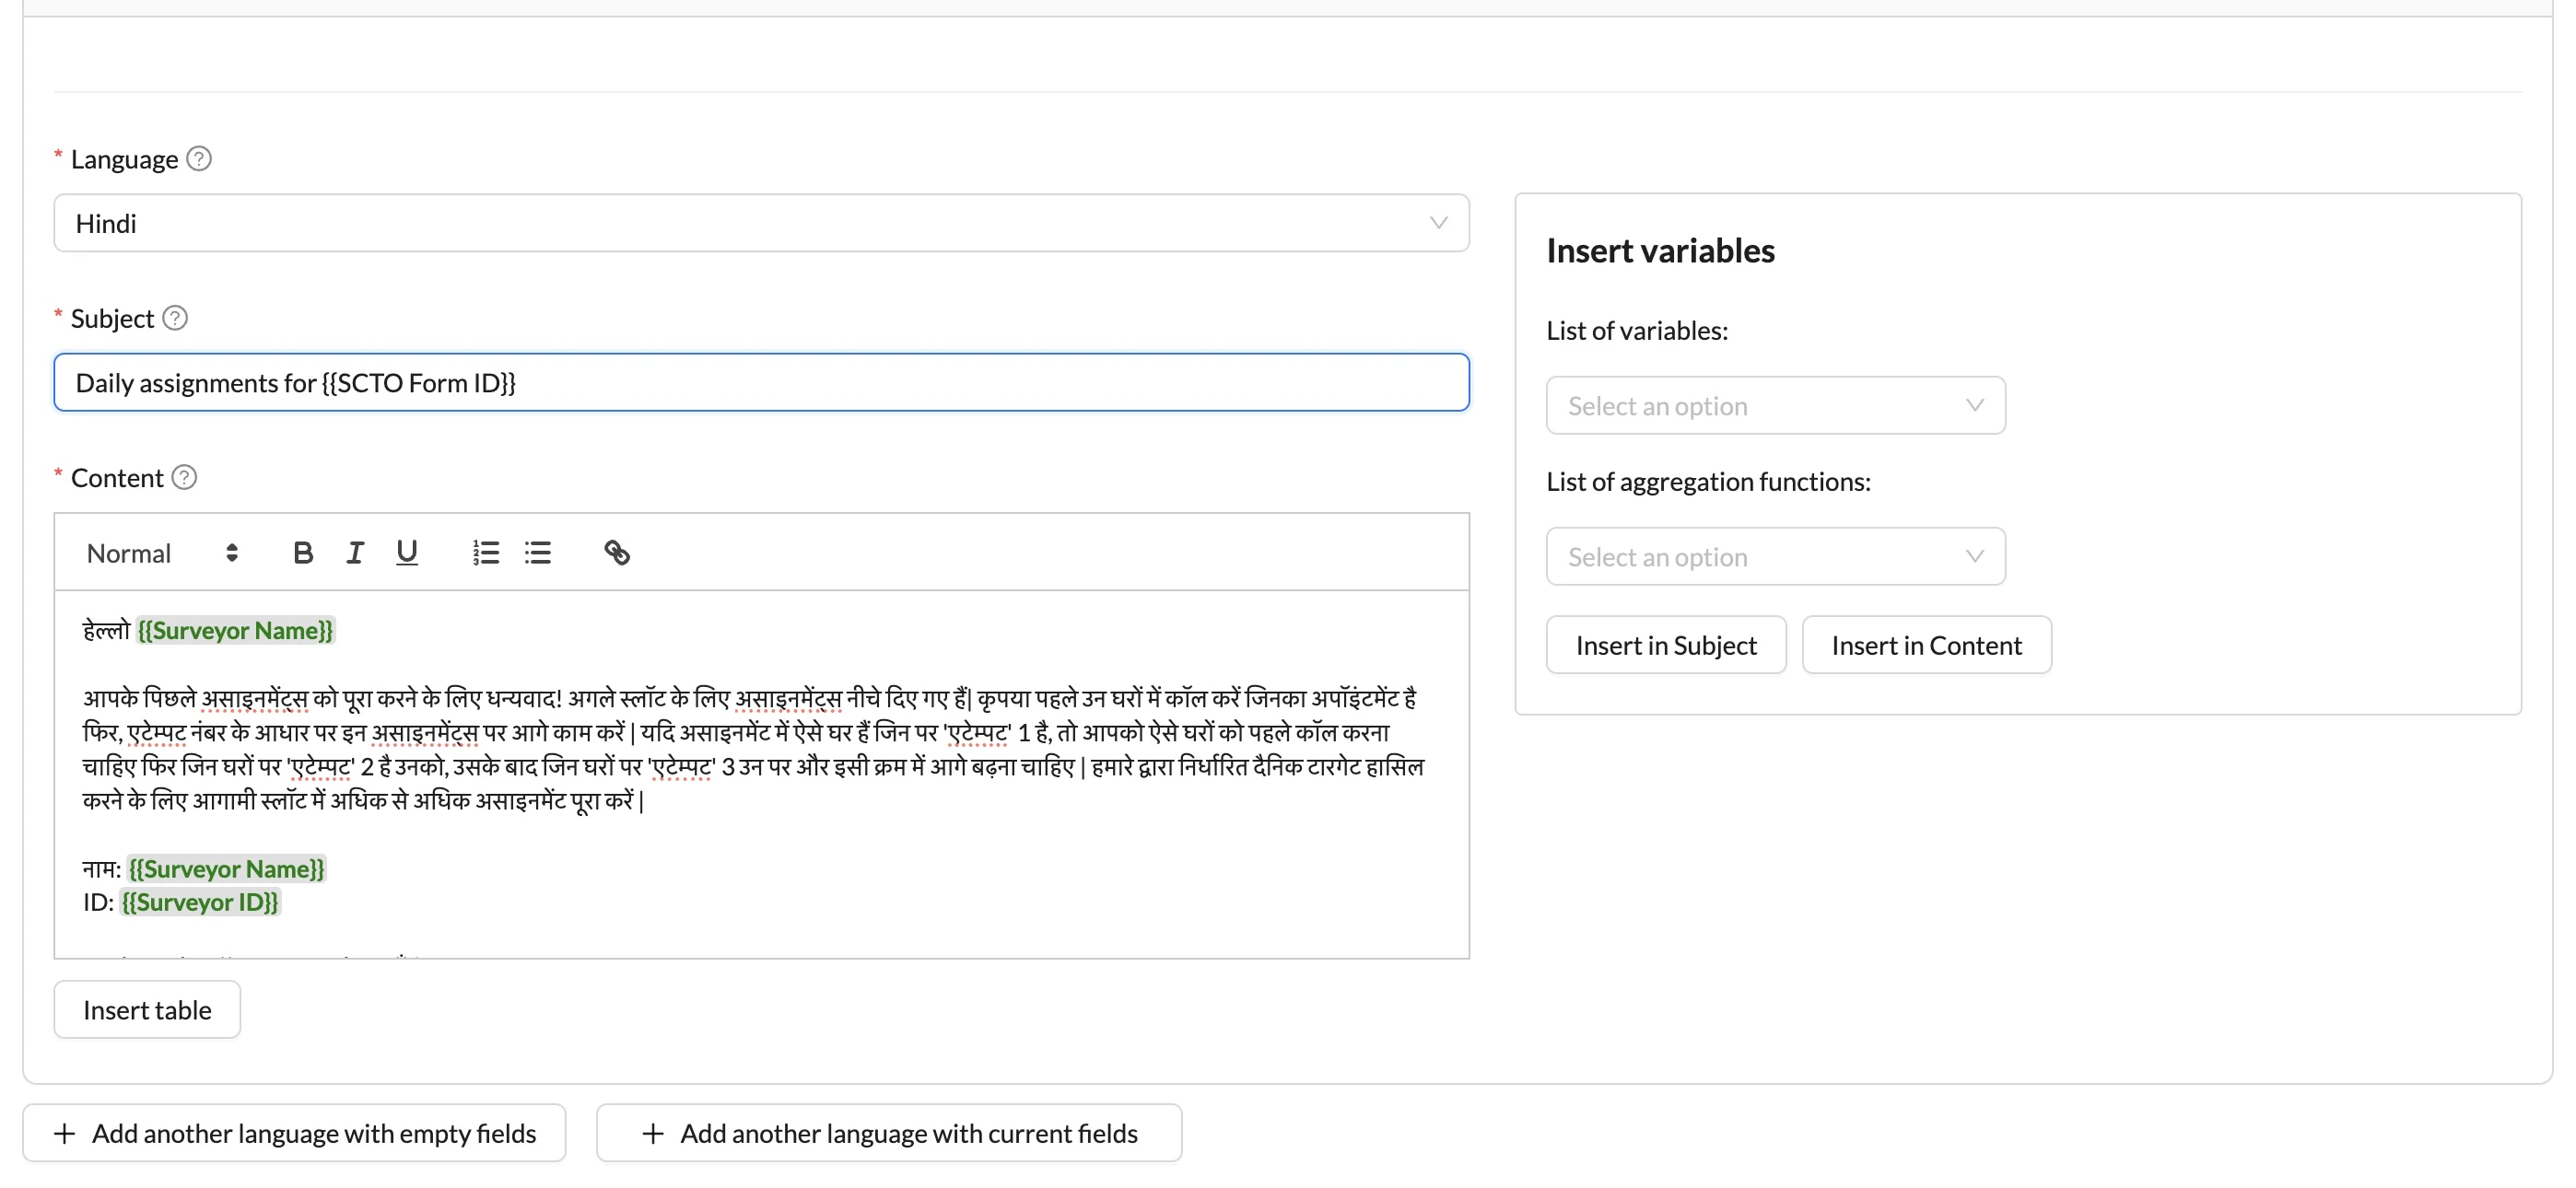
The email subject and content can include variables like surveyor name, surveyor id as well as tables with data from a Google Sheet or from a SurveyStream table (as per selection in the previous step).
-
Insert variable
Variables are added to the email subject and content using the options on the right side of the screen. Select the variable from the dropdown and click on
Insert in SubjectorInsert in Contentbutton to add it to the email subject or content respectively. The variables dropdown includes:- Survey Name: The name of the survey.
- SCTO Form ID: The ID of the main form selected in the previous step.
- Assignment Date: The date of the assignment. This is the date when the email is sent.
- Config Name: The name of the email configuration.
- Schedule Name: The name of the schedule.
- Surveyor fields: This includes any field included in the enumerators dataset uploaded in Enumerators module like Surveyor ID, Surveyor Name, Surveyor Email as well as custom fields.
- Location fields: This includes ID and name of the location corresponding to the surveyor. Since surveyors are assigned to the prime geo level, only the prime geo level and location levels above it are available in the dropdown.
List of aggregate functionsdropdown. For example, to include the count of surveyors in the email, use COUNT function with the Surveyor ID variable.The variable when inserted in the email body show up as{{variable_name}}but when the email is sent, they are replaced with the actual values.Also, typing in a variable name with{{and}}is not allowed. You need to select the variable from the dropdown and add them using theInsert in SubjectorInsert in Contentbuttons. -
Insert table
The
Insert tablebutton allows you to insert a table with data from the Google Sheet loaded in the previous step or from a SurveyStream table. The following configuration options are available when adding a table:- Select columns to be included in the email.
- Change the name of the columns in the email by editing the
Display Namefield. - Apply filters to filter data included in the email. For example, to send only assignments with fewer than 3 attempts, add a filter where
Total Attempts is smaller than 3. - Sort the data in the table by any column. For example, if you want to sort the assignments by ascending order of the number of attempts, you can select the
Total Attemptscolumn and select theAscendingoption. - Change the order of the columns in the email by dragging and dropping them in the required order. This is done on the main screen after the table is inserted in the email body.
Add another language buttons in the bottom to add more languages.
Step 3. Email Schedules
As the last step in the configuration, configure the schedule for sending the emails: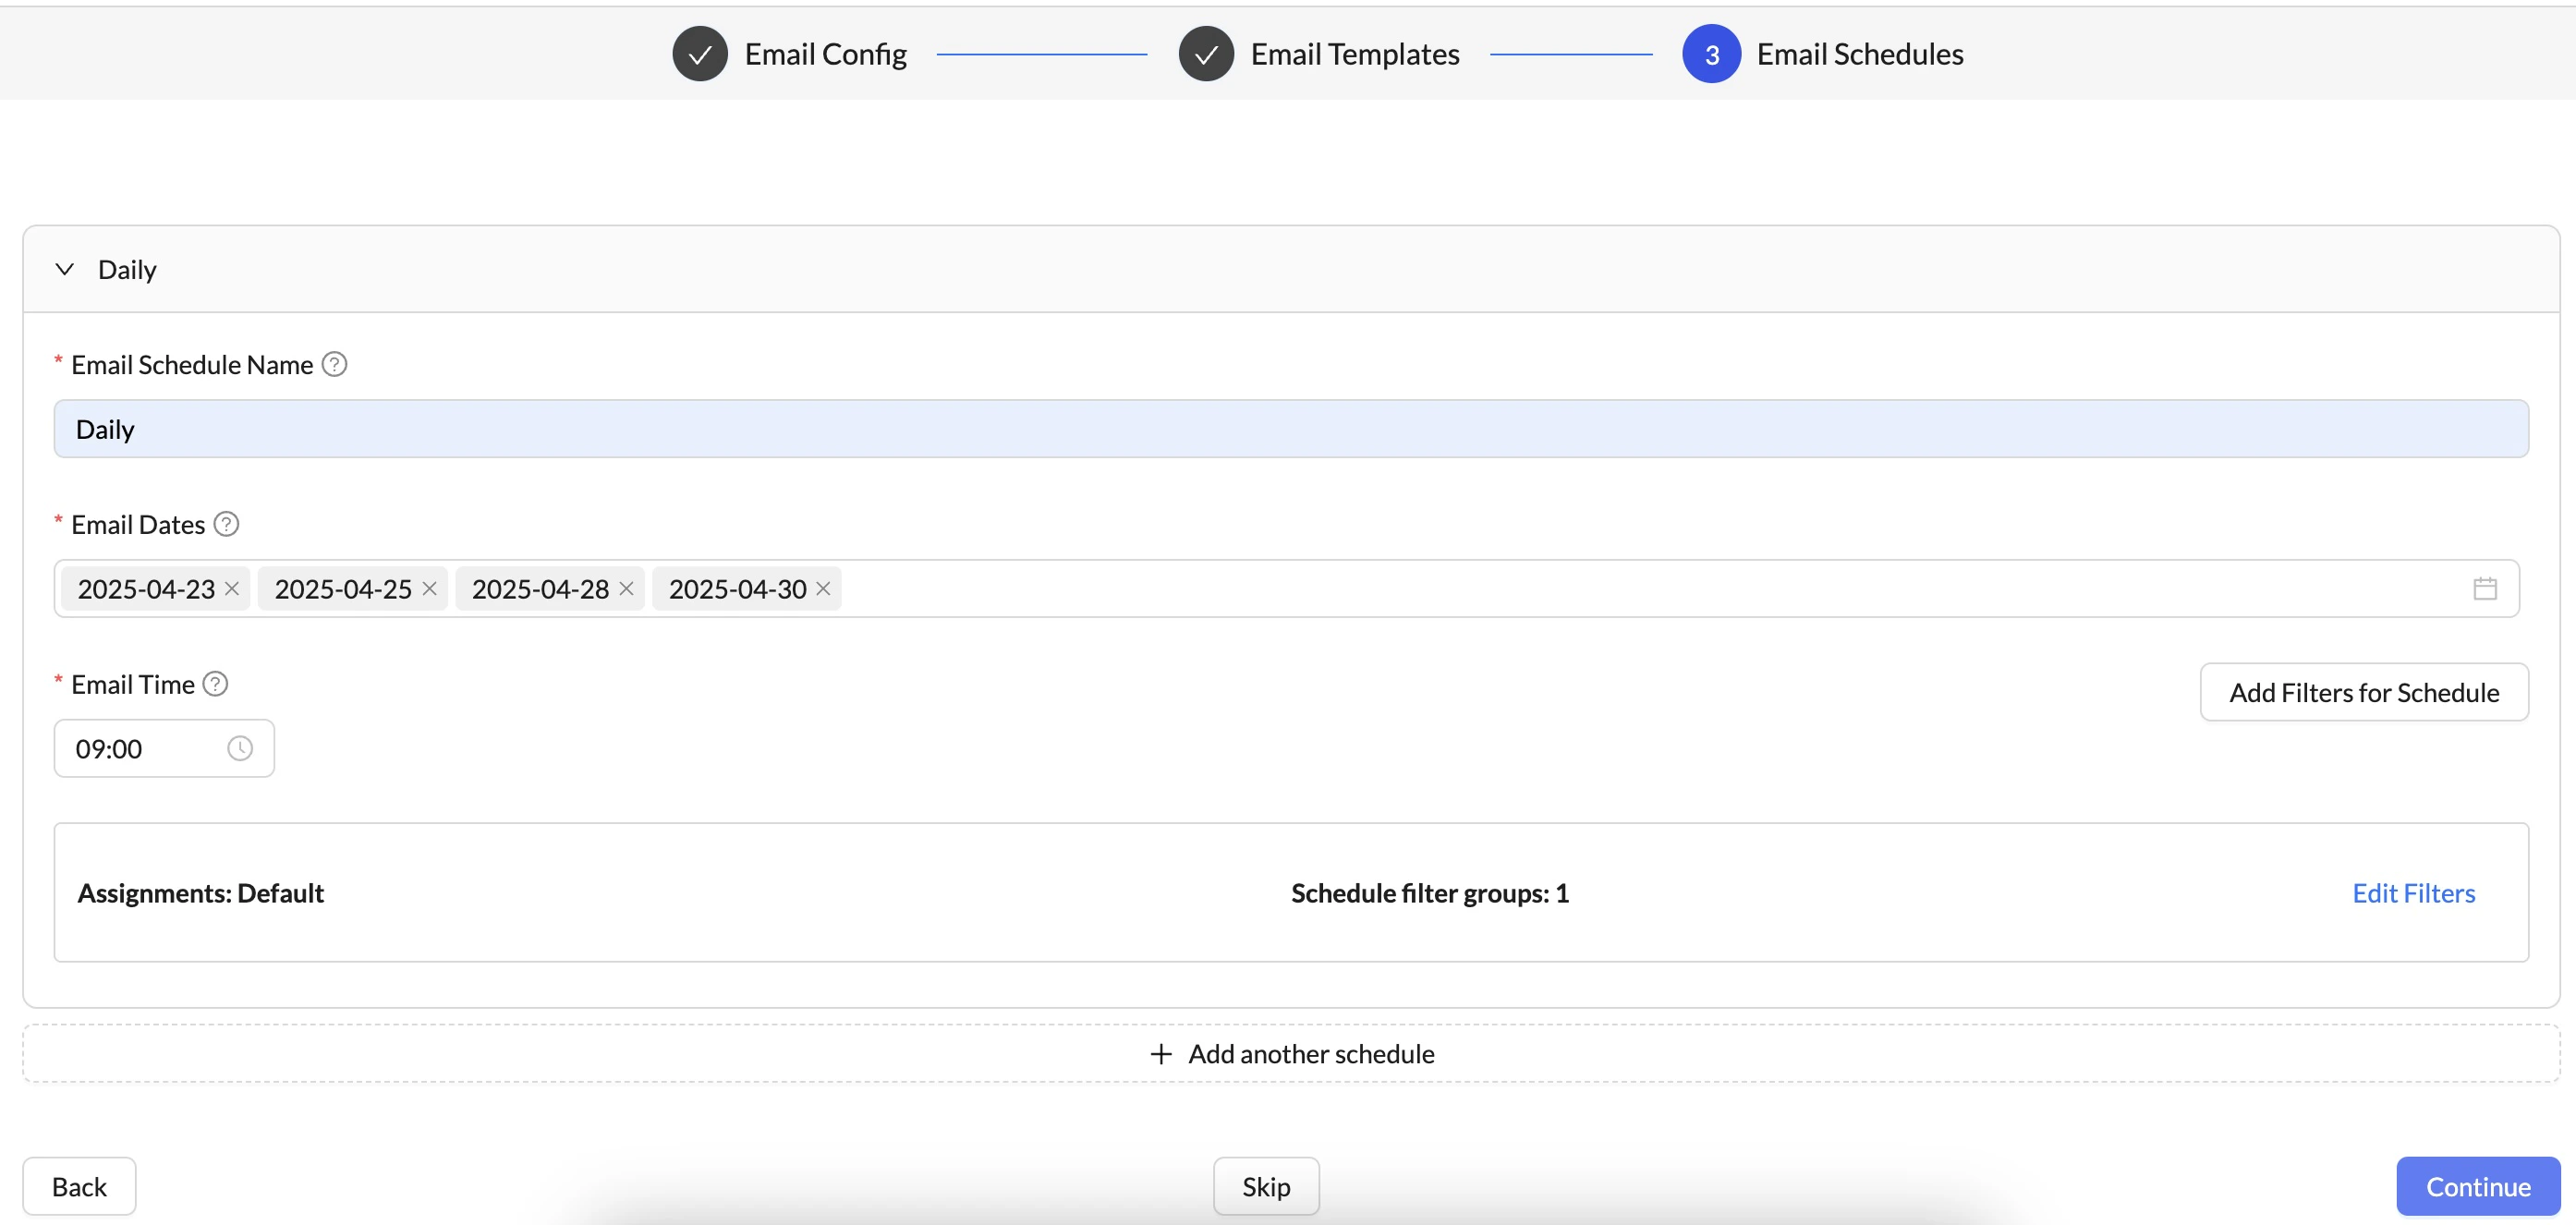
You can use the
Add filters for schedule button to add filters on the data to be sent in the email which are specific to the schedule. For example, to send only targets with 0 attempts on a Monday of each week, you can create a schedule for Mondays and add a filter for Total Attempts = 0.
Other actions on emails home page
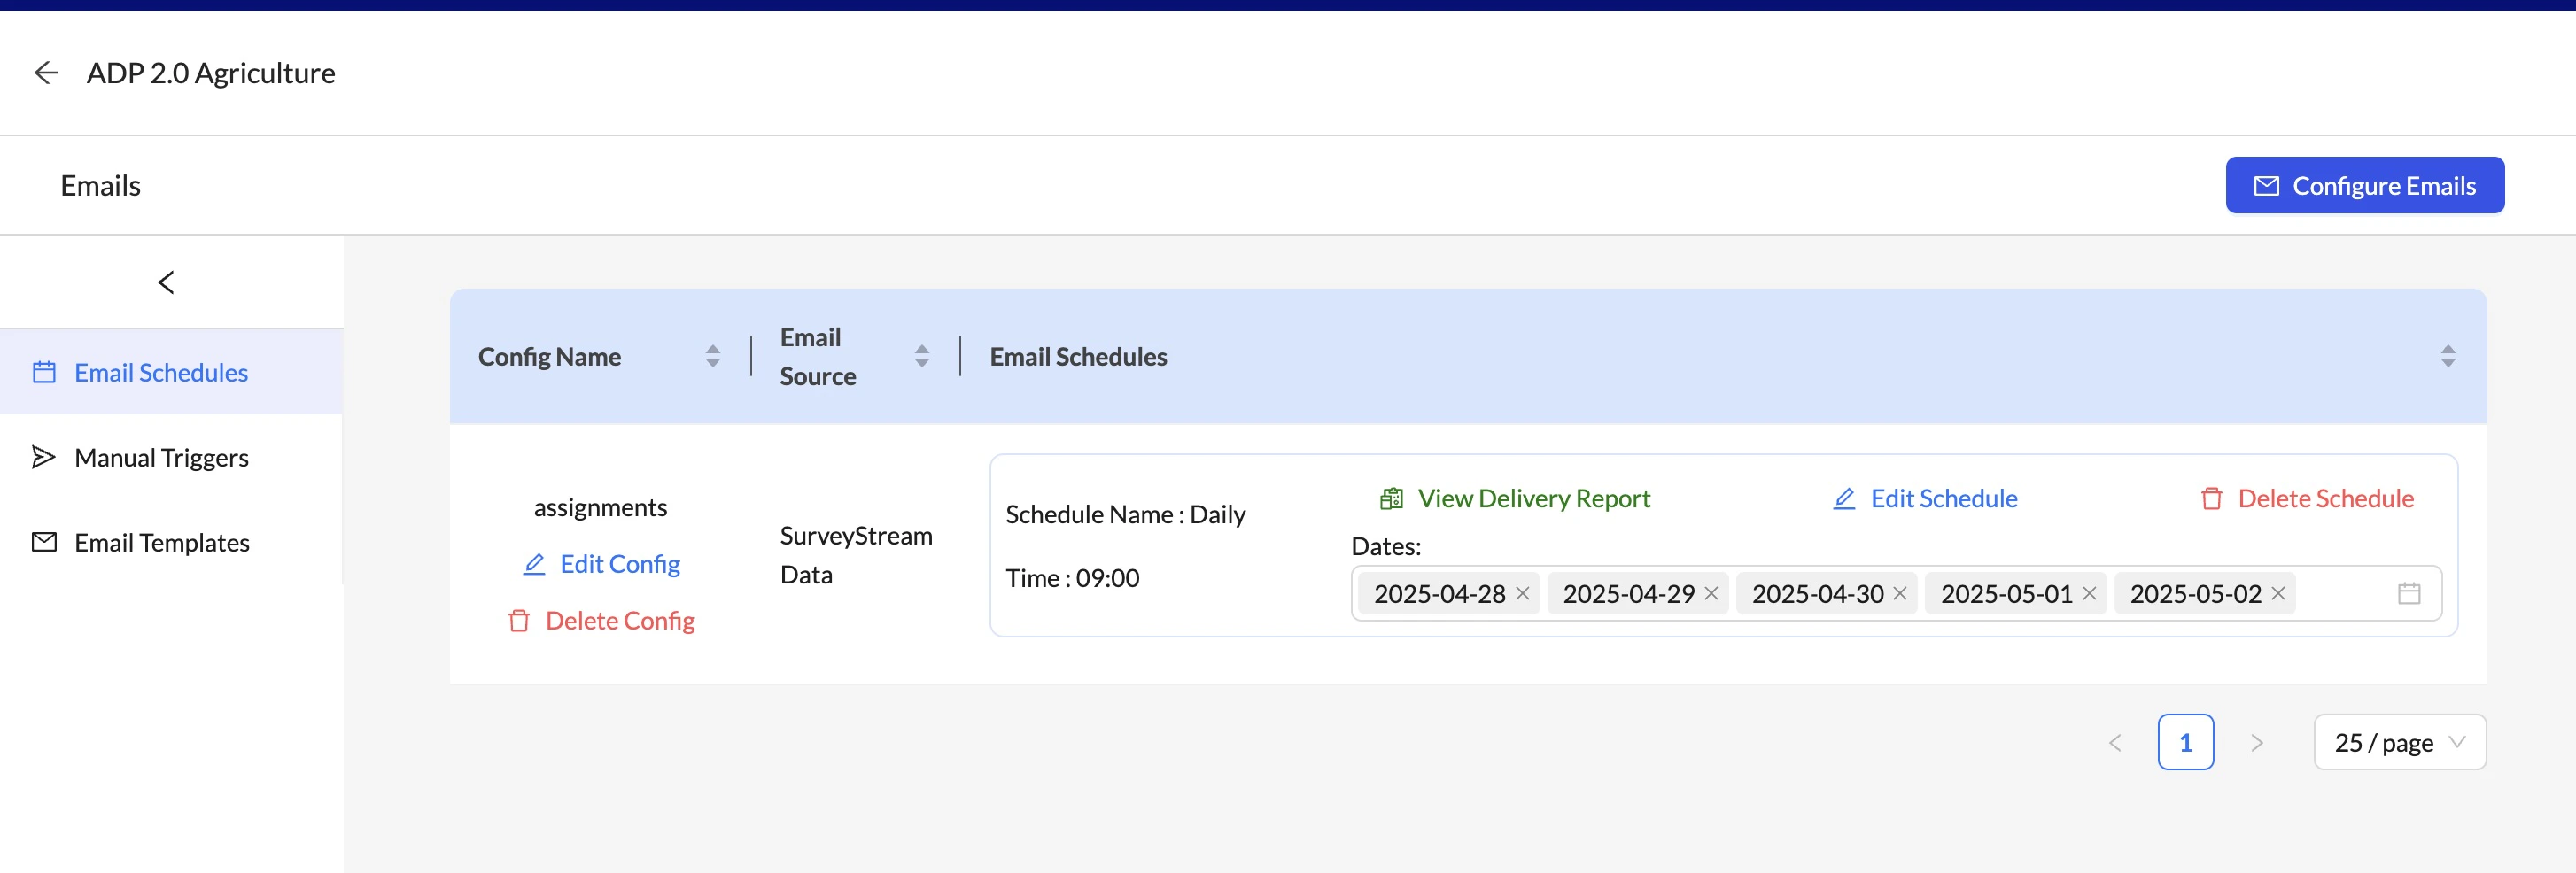
-
Edit Config: To edit the config details (details filled in Step 1) for an existing email configuration, click on the
Edit Configbutton next to the configuration name. This will open a drawer with the config details to edit. -
Delete config: To delete an email configuration, click on the
Delete Configbutton next to the configuration name.Deleting an email configuration will delete all the schedules and templates associated with it. Deleted configurations cannot be restored. -
Edit schedule: To edit the schedule details (details filled in Step 3) like to add/remove dates or to update the email time, click on the
Edit Schedulebutton next to the schedule name. This will open a drawer with the schedule details to edit. You can also update/add filters for the schedule in this step.Editing the schedule will not affect the emails already sent. -
Delete schedule: To delete a schedule, click on the
Delete Schedulebutton on the Emails home page.Deleting a schedule will not affect the emails already sent. Also, the schedule cannot be restored once deleted. -
View delivery report: To view the delivery report for a particular schedule, click on the
View Delivery Reportbutton next to the schedule name. This will open a popup with the status of emails sent. This can be used to check if a specific surveyor received the email or not and error messages, if any. In case of failures, kindly reach out to the SurveyStream team for assistance if the error message is not clear.
Edit email templates
To edit the email templates for an existing email configuration, navigate to theEmail Templates tab on the Emails home page. It shows a table with a list of templates created for each language and each configuration in Step 2.
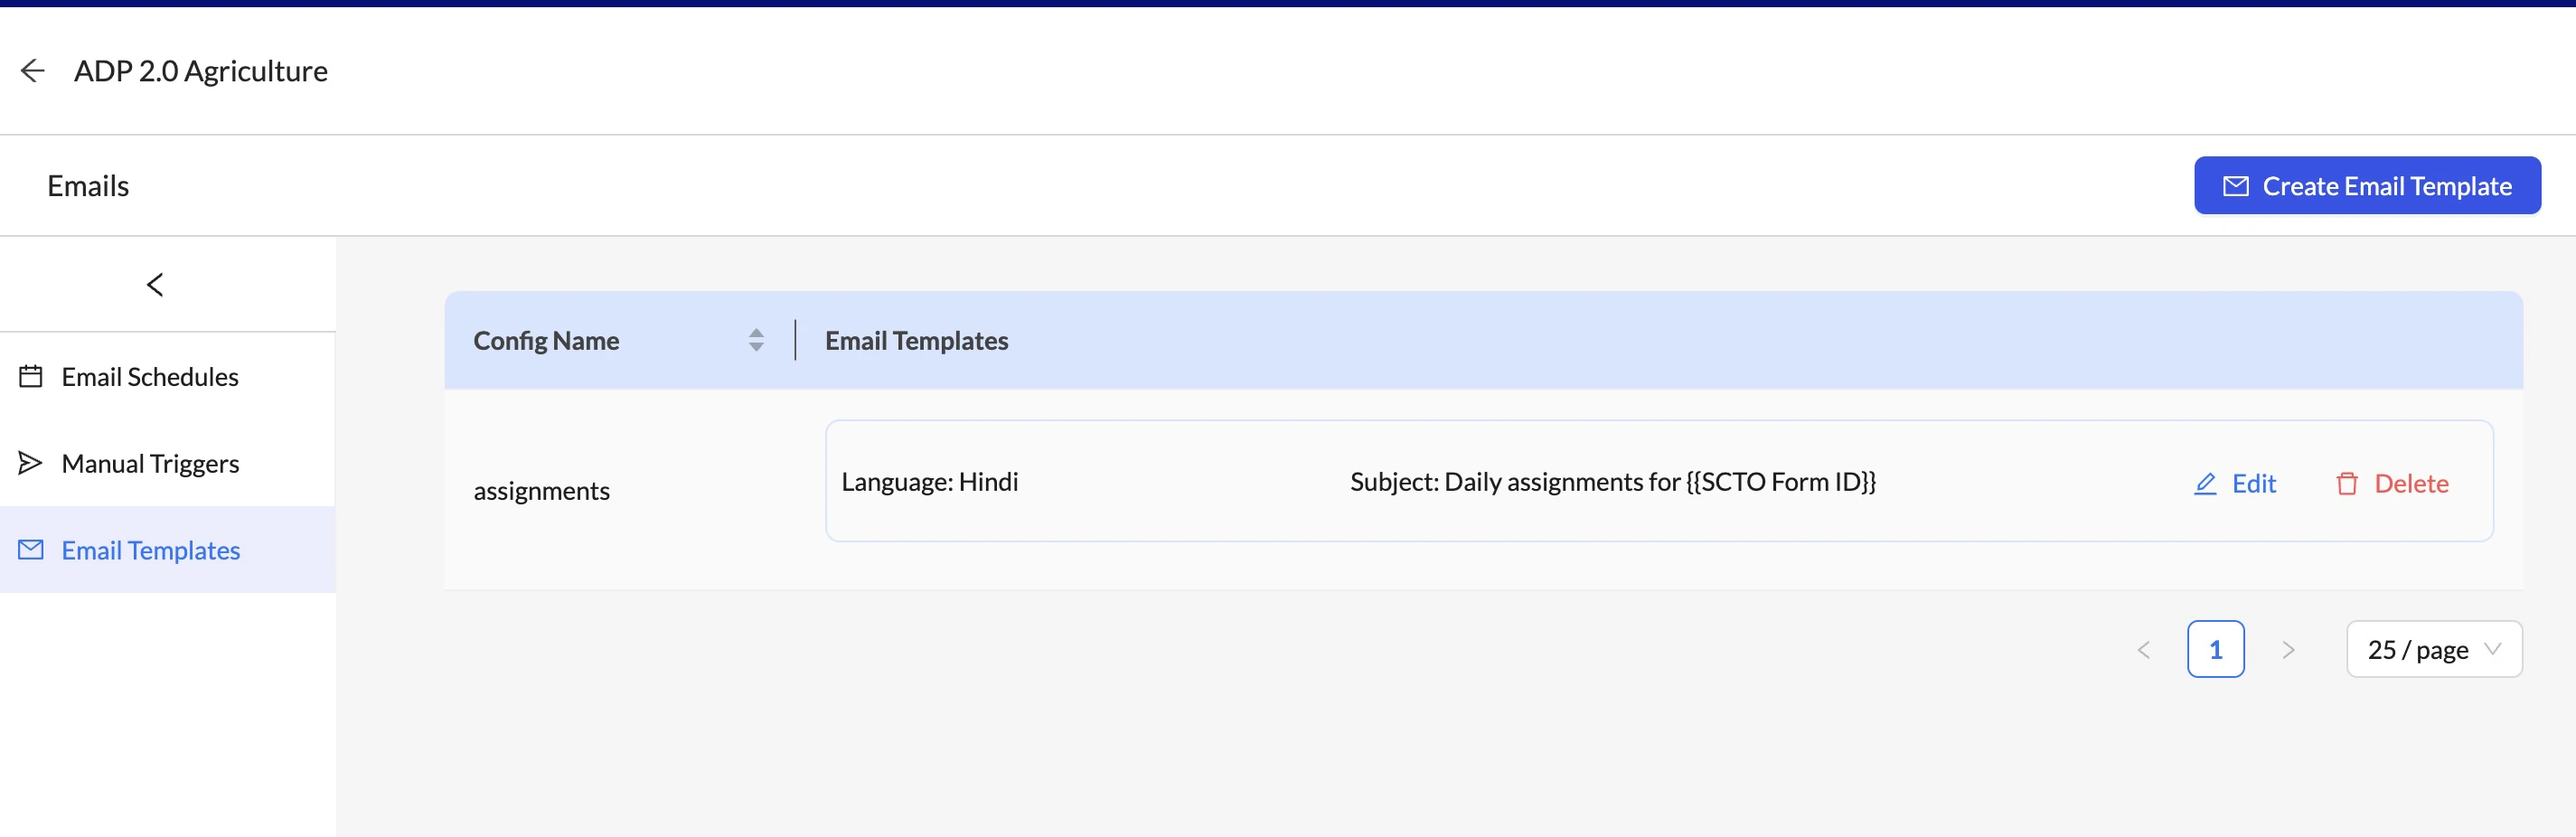
Edit button next to the template you want to edit. This will open a drawer with all the details of the template - subject, body and options to add variables and tables.
You can also delete a template by clicking on the Delete button.
Deleting a template will not affect the emails already sent.
Also, the template cannot be restored once deleted.
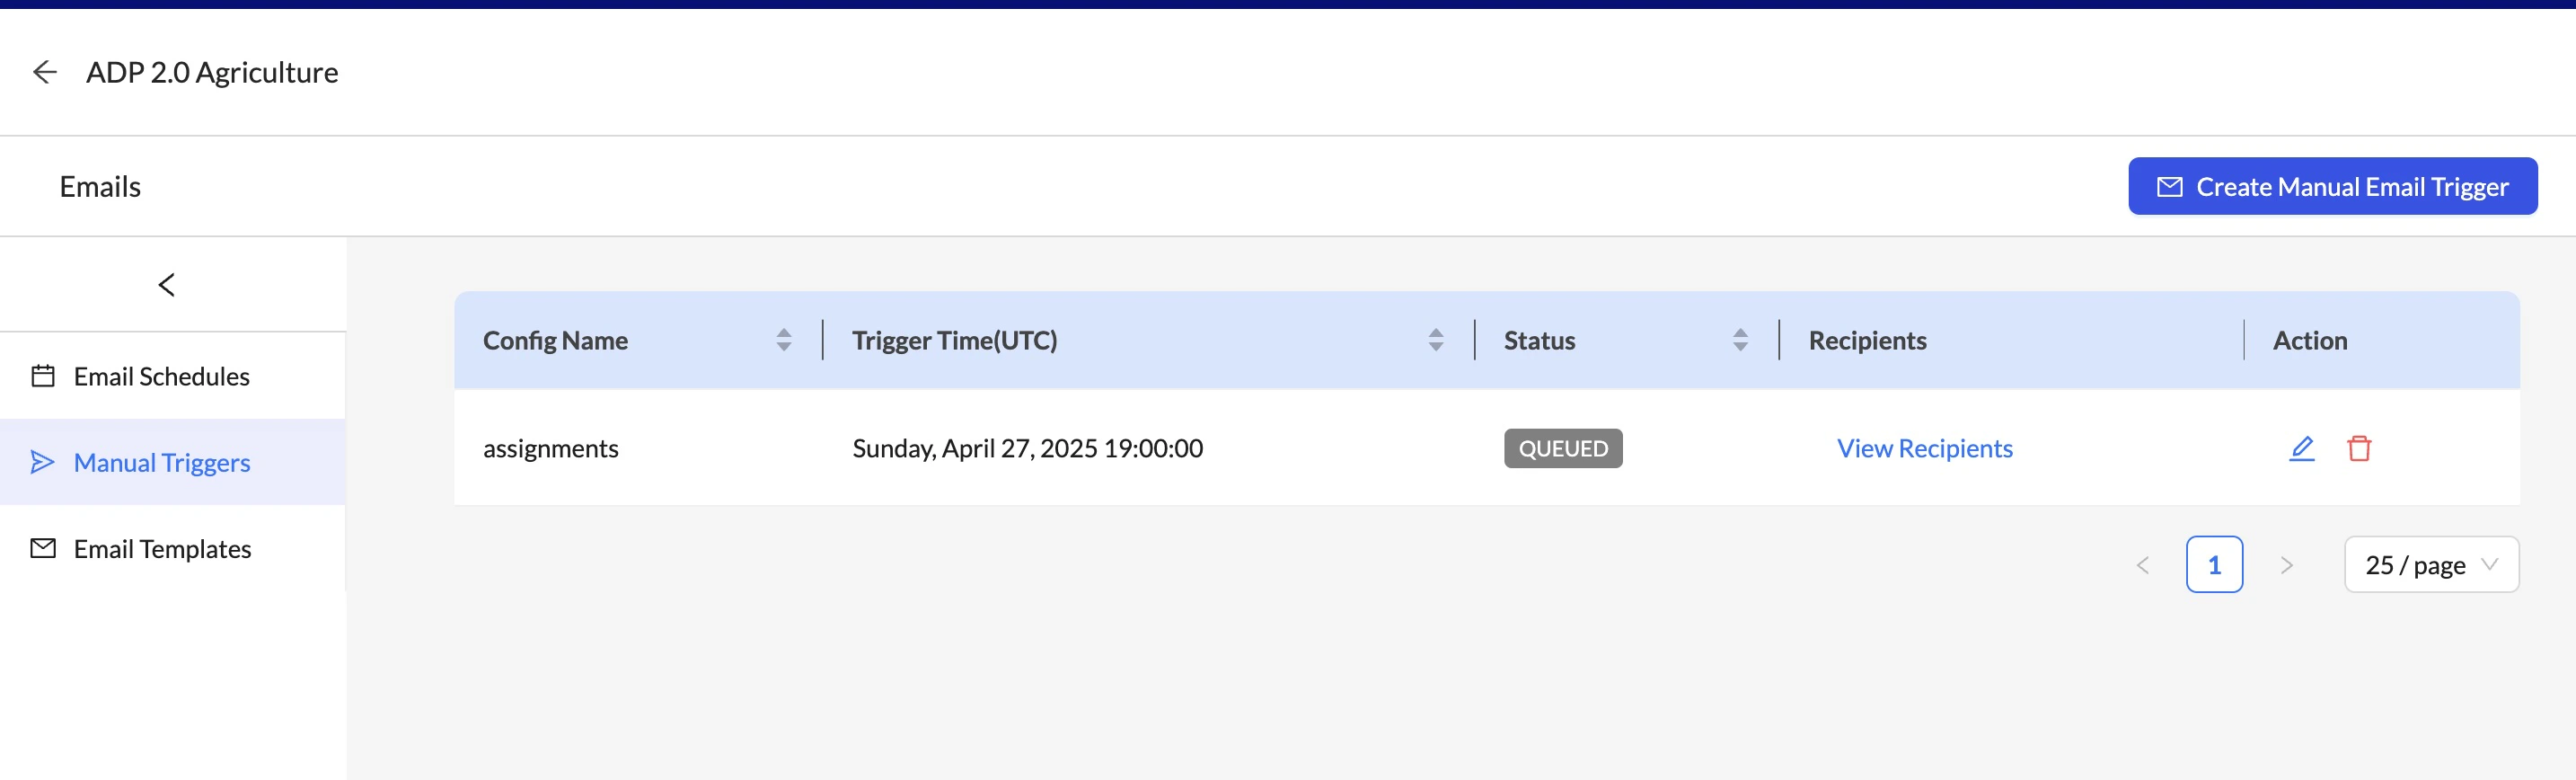
Manual Triggers
If you would like to send emails manually to a specific surveyor or a select group of surveyors at a specific date and time outside the regular schedule, you can do so using theManual Triggers tab on the Emails home page.
It shows a table with the list of all manual triggers created. To create a new manual trigger, click on the Create Manual Email Trigger button. This will open a popup where you can provide the following details: